Home Gym Ceiling Height Calculator: Check Your Rack and Exercises
Your usable ceiling height is the floor-to-lowest-obstruction measurement, not necessarily the room's advertised height. Enter the highest fixed equipment point, then add your measured pull-up or overhead movement if those will happen in the same position.
The calculator returns the tallest condition plus an editable planning margin. It does not replace the equipment manual, mounting instructions, structural review, or clearance required by building and fire rules.
Calculate Your Required Clear Height
Enter dimensions in inches. Measure from the final training surface, including rubber flooring or a platform. Leave optional fields blank if that movement will not be performed at the rack.
Planning tool
Ceiling Height Planning Calculator
The result uses the largest of equipment height, pull-up top position, and overhead movement—then adds your chosen margin.
Minimum clear height from your entries
Enter the highest equipment point
Measure to the lowest fixed obstruction—not only to the finished ceiling.
This is a fit-planning estimate, not structural or installation approval. The equipment manual, required mounting space, building rules, and safe exercise clearance take priority.
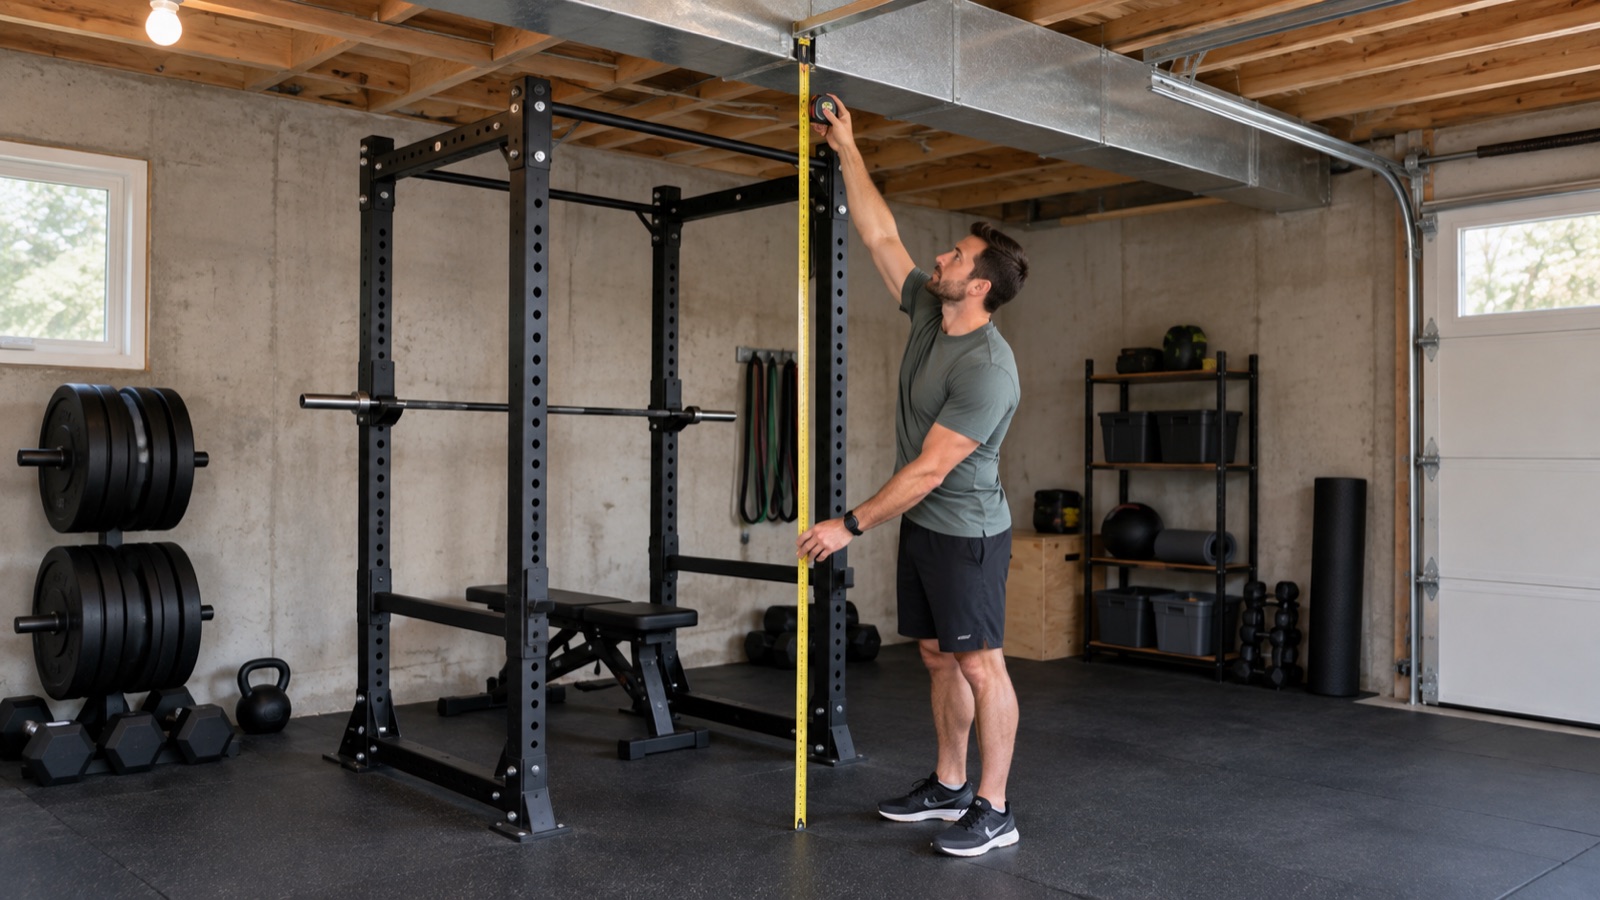
Measure the Lowest Obstruction, Not the Best-Looking Spot
- Install or account for the final flooring thickness.
- Measure vertically where each rack upright, pull-up grip, and overhead bar path will sit.
- Record the lowest joist, duct, garage-door track, opener, pipe, light, fan, sprinkler, cable tray, or sloped-ceiling point inside the working envelope.
- Open doors and move tracks through their complete path.
- Repeat measurements at the front, center, and back of the planned rack.
What Each Calculator Input Means
| Input | How to measure it | Common mistake |
|---|---|---|
| Highest equipment point | Floor to the tallest fixed or installed component in the exact configuration | Using upright height while a pull-up handle, cable tower, or bolt sits higher |
| Pull-up bar height | Floor to the grip surface | Assuming rack height and bar height are identical |
| Head rise above bar | From grip surface to the top of your head at the highest intended pull-up position | Using chin-over-bar height when chest-to-bar or another movement goes higher |
| Highest overhead movement | Floor to the top of the bar, plate, dumbbell, kettlebell, or hand at full intended reach | Measuring body reach without the implement |
| Planning margin | An extra buffer you choose after checking the manual and movement | Treating the default three inches as a safety standard |
Worked Example: Why Rack Height Alone Is Not Enough
Suppose a rack's highest point is 85 inches. Its pull-up bar is 80 inches high, and the user's head rises 12 inches above it. Their overhead bar position reaches 96 inches. With a 3-inch planning margin, the calculator compares:
- Equipment: 85 + 3 = 88 inches
- Pull-up: 80 + 12 + 3 = 95 inches
- Overhead movement: 96 + 3 = 99 inches
The overhead movement controls, so the planning result is 99 inches, or 8 feet 3 inches. An 8-foot ceiling could fit the rack itself while still being too low for that exercise at that location.
Options for a Low Ceiling
- Choose a documented short rack. REP, for example, lists rack families with different upright heights, and its compact PR-1050 is shorter than typical full-height models.
- Check whether the exact rack permits a pull-up bar to be mounted lower or inverted. Do not improvise a configuration absent from the manual.
- Move standing overhead exercises outside the rack or replace them with seated or kneeling variations only when appropriate to the program.
- Avoid a raised platform under the tallest activity unless the remaining clearance has been recalculated.
- Place the rack between joists only if the complete movement and equipment still have clear space and no structural or code issue is created.
- Choose wall-mounted or folding equipment only after measuring its open, closed, and exercise positions.
Do not shorten, drill, or remove structural rack components unless the manufacturer provides a documented method.
Final Fit Check Before Ordering
- Download the current manual and dimension drawing for every selected component.
- Confirm the highest configuration, including attachments you may add later.
- Mark the rack and bar working envelope on the floor.
- Hold a lightweight PVC pipe or broomstick at the highest intended movement position—without weight—and measure it.
- Compare every point to the lowest obstruction and manufacturer-required space.
- Confirm anchoring, structure, ventilation, egress, electrical access, and fire-safety requirements.
Sources and Manufacturer Guidance
Requirements can vary by product, model, and situation. These primary sources informed this guide; official instructions for your exact product and current authoritative guidance take priority.
- REP Fitness Rack Guide: rack heights and configuration dimensions
- REP Fitness Rack Builder: measuring ceiling and pull-up clearance
- REP Fitness Wall-Mounted Racks: open-position and room considerations
- Rogue P-3 Pull-Up System: product-specific mounting-height guidance
- Rogue P-4 Pull-Up System: high-ceiling product option
Frequently Asked Questions
-
It can be high enough for many racks, but not every pull-up or overhead movement. Compare the exact rack's highest point and your measured movement positions to the lowest obstruction.
-
Use your measured head rise for the highest pull-up variation plus the equipment maker's required clearance and a deliberate planning margin. A fixed universal number does not fit every user or movement.
-
Use the finished floor. Rubber tiles, a platform, or shims reduce usable height and may change equipment leveling.
-
Only if every door, track, opener, rack component, bar path, and user movement remains clear in all positions and the installation meets the manuals and local requirements. Door movement makes this a high-risk obstruction to overlook.
-
No. It is a planning estimate based on your entries. Product instructions, mounting requirements, building rules, and professional structural or installation advice take priority.